You hit record, jump into a match, and two minutes later, the footage looks like a slideshow even though the game felt fine.
That’s not bad luck. It’s your phone doing two heavy jobs at once: rendering the game and encoding video in real time. When CPU, GPU, RAM, and storage bandwidth get stretched, frames drop, heat rises, and audio can drift.
To understand how to record gameplay on Android without lag, you need to manage resource competition. Follow these 11 steps, and you’ll reduce recording lag dramatically on both budget and flagship Android phones.
Key Takeaways
- Use your phone's native Screen Recorder (Android 11+) or Google Play Games recorder as your first option; both have the lowest system overhead
- Set resolution to 720p at 30fps on budget and mid-range phones to prevent lag
- Enable hardware encoding (H.264) in your recorder's settings; this is the single highest-impact change most guides skip
- Close all background apps and let your phone cool before starting long sessions
- Thermal throttling is the hidden cause of mid-session lag that suddenly appears after 10-15 minutes of smooth recording
Step 1: Restart Your Phone And Clear RAM Before Every Session
A fresh restart clears cached processes and frees RAM that background apps quietly hold onto even when "closed." On Android, apps don't fully shut down unless you force-stop them or restart the device, and that leftover memory competition directly impacts recording performance.
Restart your phone, wait 60 seconds after it boots, then go straight to your game and recorder. Don’t open other apps first.
Also remember that recording sessions often run longer than casual gameplay. Many players don’t realize how prolonged gaming affects posture, especially when staying locked in during competitive matches. Poor sitting position over time can cause neck stiffness and back strain, which reduces focus and reaction speed. Short breaks between sessions help both your device and your body stay in peak condition.
Step 2: Choose Your Recording Tool (Native Vs. Third-Party)
Not all recorders are created equal for gaming. Your choice here affects everything else in this list.
Option A - Android's Built-In Screen Recorder (Android 11+)
Swipe down to open your Quick Settings panel (swipe twice from the top), then look for the Screen Recorder tile. If it's not visible, tap the pencil/edit icon and add it from the hidden tiles.
The built-in recorder has the lowest overhead of any option because it's deeply integrated with the OS there's no third-party process fighting for resources. It's the right default for budget and mid-range devices. The main limitation: fewer configuration options for bitrate and encoder type.
Option B - Google Play Games Recorder (Best For Gaming)
If you have Google Play Games installed (it comes pre-installed on many Android devices and is available free on Google Play), this is often the cleanest option for gaming content specifically.
Open the app, tap your game, then tap the record button before launching. Google Play Games is optimized for gameplay capture it manages frame rate targets during recording intelligently. The output is clean, watermark-free, and YouTube-ready.
Option C - Third-Party Apps (AZ Screen Recorder, XRecorder, Mobizen)
Third-party apps offer more control over bitrate, encoder type, and audio sources. They're worth it for mid-range and flagship users who want to fine-tune output quality. See the comparison table in the next section for specifics.
Step 3: Set The Right Resolution And Frame Rate For Your Phone
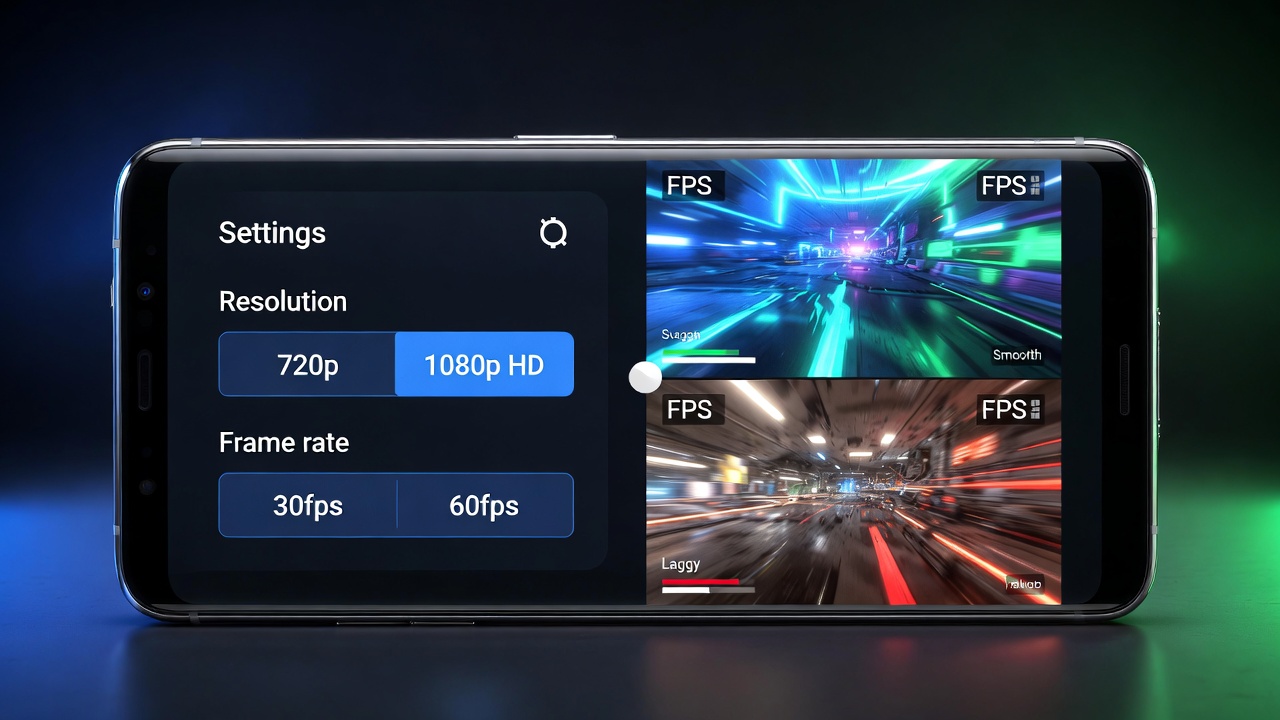
Open your screen recorder settings. You’ll usually find this by tapping the gear icon inside the app, or in Quick Settings if you’re using the built-in recorder. Choose the resolution and frame rate based on your phone’s power. Don’t guess.
For example, someone using a Redmi Note 11 tried recording BGMIat 1080p and 60FPS. The game kept lagging. When they changed the recording to 1080p and 30FPS, the lag stopped completely.
This is especially important in competitive matches, where stable frame rates matter more than maximum resolution. Recording at 60FPS on a mid-range device may sound ideal, but if your phone can’t sustain both gameplay and encoding at that level, you’ll experience stutters during intense fights.
Why? Because the phone no longer had to handle 60 game frames and 60 recording frames at the same time.
Start with stable settings first. Once everything runs smoothly, you can test higher settings if your phone can handle it.
Lock Your Display To 60Hz (If You Have A 120Hz Phone)
Many modern Android phones run at 90Hz or 120Hz by default.
If you record at 60fps while your display runs at 120Hz:
- The GPU renders up to 120 frames
- The recorder captures 60 frames
- Extra GPU load increases heat and battery drain
On mid-range devices, this can trigger earlier thermal throttling.
To reduce strain:
- Go to Settings → Display → Refresh Rate
- Switch from 120Hz (or 90Hz) to 60Hz before recording
You won’t lose recording quality, but you’ll gain stability.
This is especially important for long sessions (20+ minutes).
Step 4: Turn On Hardware Encoding (H.264)
Next, check your encoding settings.
In most recording apps, go to: Settings → Video → Encoding Type
Choose “Hardware” or “H.264 (Hardware)” if available.
If you’re using the built-in Android recorder, hardware encoding is usually already turned on. Still, it’s smart to double-check, especially on phones with custom Android versions like Samsung One UI, MIUI, or ColorOS.
Why This Matters
Hardware encoding uses a dedicated chip inside your phone to process video. Software encoding uses the main CPU. The CPU is already busy running the game, so offloading recording to hardware reduces lag.
In testing across mid-range phones, switching from software to hardware encoding significantly reduced frame drops during recording. It’s one of the most important settings, and it takes less than a minute to change.
If your app only says “H.264” and doesn’t mention hardware, check the app description or FAQ. On most modern Android phones (Android 8.0 and newer), H.264 usually uses hardware acceleration by default.
Step 5: Set The Right Bitrate (The Number Most Guides Skip)
Bitrate controls how much data is written per second of video. Higher bitrate = better quality + more CPU/storage strain. Most guides either ignore this setting or tell you to max it out; both approaches cause problems.
Use these targets:
- 720p:4-6 Mbps
- 1080p at 30fps:8-10 Mbps
- 1080p at 60fps:10-12 Mbps
Going above these numbers on a mobile encoder doesn't meaningfully improve visual quality for gameplay footage; it just adds strain and increases file size. The H.264 codec is efficient; trust the recommended range.
Step 6: Configure Internal Audio Recording (Android 10+ Only)
Android 10 introduced the AudioPlaybackCapture API (Android developer documentation), which lets compatible recorder apps capture internal game audio without routing through the microphone, no ambient noise, no echo.
In your recorder's audio settings, look for "Internal Audio," "System Audio," or "App Audio" and enable it. If your recorder doesn't show this option, it doesn't support AudioPlaybackCapture, and you'll need to use microphone audio or switch apps.
One caveat:some games (particularly apps with DRM-protected audio) block internal capture as a copyright protection measure. If your game audio doesn't record, this is likely why microphone recording is the fallback.
Step 7: Enable Game Mode Or Game Booster (If Your Phone Has It)
Most modern Android phones include a built-in gaming performance mode. Depending on your brand, it may be called:
- Samsung → Game Booster
- Xiaomi → Game Turbo
- OnePlus → Gaming Mode
- Realme → GT Mode
- Google Pixel → Game Dashboard
These modes do three important things:
- Prioritize CPU and GPU resources for the game
- Block background apps and notifications
- Lock frame rate stability
To enable it:
- Open your game.
- Swipe from the edge or open the gaming toolbar (varies by brand).
- Enable performance or priority mode before starting recording.
This reduces background scheduling interference and helps prevent frame drops while recording.
Step 8: Disable Notifications And Enable Do Not Disturb
A notification banner popping up mid-game is more than annoying; on some devices, it briefly wakes background processes, creating a micro-stutter in both the game and the recording. Before you start, pull down your notification shade and enable Do Not Disturb (or equivalent on your device skin).
Also consider: disable your phone's auto-brightness during sessions. Screen brightness changes trigger display processing that can briefly compete with your encoder on budget devices.
Step 9: Choose Internal Storage Over SD Card For Recordings
This one surprises people. If you're recording to a microSD card, the card's write speed is now part of your recording pipeline. Slow SD cards, anything below UHS Speed Class 3 (U3) can't write video data fast enough to keep up with your bitrate target, causing stutters, dropped frames, or corrupted recordings.
Unless you have a high-speed U3 or V30-rated SD card, record to internal storage by default. Set this in your recorder's storage/output destination settings. You can transfer the file to the SD card after recording is complete.
Keep At Least 10-15% Of Internal Storage Free
Android storage performance slows down when nearly full.
When storage is above 85-90% capacity:
- Write speeds drop
- File fragmentation increases
- Recording stutters become more likely
Before recording long sessions:
- Delete unused apps
- Clear large downloads
- Move old recordings to cloud storage
Maintaining free storage ensures stable write speeds during capture.
Step 10: Manage Device Temperature During Recording
Temperature management is ongoing, not a one-time step. Here's what actually works:
- Start sessions with a cooled phone. Don't record immediately after a charging session; lithium batteries generate heat while charging, and a warm phone will throttle faster
- Remove your phone case during long recording sessions, as cases trap heat
- Avoid direct sunlight or recording near heat sources
- Limit continuous sessions to 20-30 minutes on budget/mid-range devices; flagship phones can typically handle 45-60 minutes before throttling becomes noticeable
- Phone cooling accessories (clip-on semiconductor coolers) genuinely help for extended sessions, not a gimmick for serious mobile content creators
If you notice your recording getting choppier as a session progresses, thermal throttling is almost certainly the cause. Stop, let the phone rest for 10 minutes, and you'll typically restore baseline performance.
Step 11: Test, Trim, And Verify Your Recording Before Going Live
Record a 2-minute test clip before committing to a full session. Play it back at full speed and check:
- Frame consistency:no obvious stutters or frozen moments
- Audio sync:clap your hands once at the start of the test, the visual and audio should match exactly on playback
- File integrity:the video should play without corruption warnings
If the test clip passes, you're ready for a full session. If not, revisit Steps 4 (encoder type) and 5 (bitrate) before investing time in a full recording.
Why Gameplay Lags When You Record On Android
To fix lag permanently, you must understand it.
1. CPU & GPU Resource Allocation
Your game uses:
- GPU for rendering frames.
- CPU for logic, physics, networking.
Screen recording adds:
- Real-time video encoding.
- File writing.
- Sometimes audio mixing.
When total demand exceeds capacity, frames drop.
The system scheduler prioritizes foreground tasks, but heavy encoding competes directly with rendering.
Core principle:Recording doesn’t slow the game; resource competition does.
2. Encoding Load And Bitrate Impact
Higher bitrate = more data per second.
That means:
- More compression work.
- More memory access.
- More storage writes.
Lowering the bitrate reduces this pressure immediately.
3. Thermal Throttling And Performance Drops
Mobile processors dynamically adjust clock speed based on heat.
When temperatures rise:
- CPU frequency drops.
- GPU performance dips.
- FPS becomes unstable.
Most users misdiagnose this as “bad recording apps.” It’s physics, not software.
How To Choose The Right Method For Your Device
The single biggest mistake gamers make is copying settings from a tech YouTuber with a flagship phone when they're running a budget device. This section gives you the right target before you touch a single setting.
Budget Android Phones (Under $200)
On phones like the Motorola Moto G series, Samsung Galaxy A-series entry tier, or Tecno/Infinix mid-budget range, the CPU and RAM headroom is tight. Trying to record at 1080p will almost certainly cause lag sometimes immediately, sometimes after a few minutes as heat builds.
What works:720p at 30fps, hardware encoding, built-in screen recorder, or Google Play Games recorder only. Avoid third-party apps with overlay interfaces (the floating bubbles) on these devices; the overlay itself consumes RAM.
Mid-Range Phones ($200-$500)
Devices like the Samsung Galaxy A54, Pixel 7a, Redmi Note 12/13 Pro, and similar Snapdragon 7-series or Dimensity 900-tier phones can handle 1080p at 30fps comfortably with hardware encoding enabled. Pushing to 60fps is possible, but it increases thermal load, so test with a 5-minute recording first before committing to a full session.
What works:1080p at 30fps, hardware encoding, AZ Screen Recorder or built-in recorder, and internal storage.
Flagship Phones ($500+)
On a Samsung Galaxy S-series, Google Pixel 8/9, or OnePlus 12, you have genuine headroom for 1080p at 60fps, but thermal management still matters for sessions over 20 minutes. These phones also support 2K recording in some apps, though 1080p is the practical sweet spot for file size vs. quality.
What works:1080p at 60fps, hardware encoding, any reputable recorder app, and internal storage.
Best Screen Recorder Options For Android Gaming
Choosing the right screen recorder can make a big difference in performance. Some tools are built into your phone and work quietly in the background. Others give you more control but may use more system resources.
Built-In Screen Recorder (Best For Stability)
Most Android phones running Android 11 or newer include a built-in screen recorder. You can usually find it in the Quick Settings panel.
Why it works well:
- It is deeply connected to the Android system.
- It uses hardware acceleration when available.
- It does not need extra overlay permissions.
- It is optimized by the phone manufacturer for your device.
Because it runs at the system level, it usually causes fewer crashes and fewer frame drops compared to third-party apps.
Limitations:
- You may not be able to manually adjust the bitrate.
- Some phones limit frame rate or resolution options.
- Advanced audio controls may be missing.
For most gamers, especially beginners or mid-range device users, the built-in recorder is the safest and most stable starting point.
Best for:Players who want reliable performance without adjusting many technical settings.
AZ Screen Recorder (Best For Advanced Control)
AZ Screen Recorder is one of the most popular third-party recording apps for Android gaming.
It gives you more control over video quality settings.
Advantages:
- You can set custom bitrate levels.
- You can choose 30fps or 60fps.
- You can control resolution manually.
- You can adjust audio settings (internal audio + microphone).
This flexibility helps if you want to fine-tune performance. For example, lowering bitrate slightly while keeping 1080p resolution can reduce lag.
Possible downsides:
- It requires overlay permissions (drawing over other apps).
- On some phones, overlays can interfere with game rendering.
- It may use slightly more system resources than the built-in recorder.
If you understand bitrate, FPS, and resolution settings, this app gives you more power. If you don’t want to adjust settings manually, the built-in option may be simpler.
Best for:Intermediate users who want full control over recording quality.
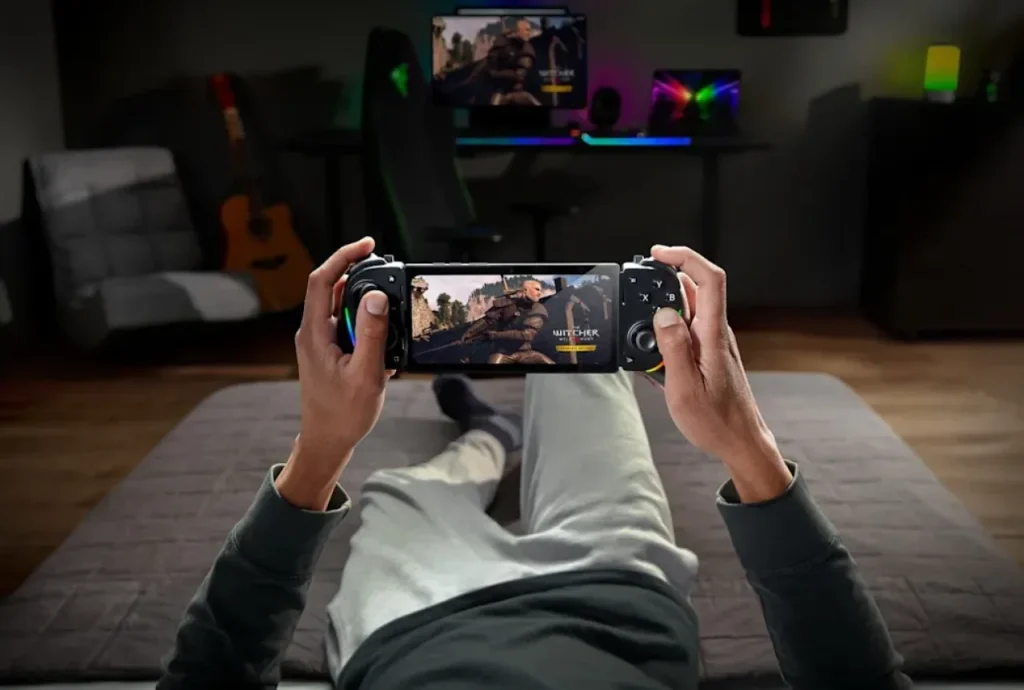
When To Use External Capture Hardware (Zero Performance Impact)
If you want the highest-quality recording without affecting game performance, external capture hardware is the best solution.
This setup usually involves:
- An HDMI capture card
- USB-C display output (if your phone supports video output)
Here’s how it works:
- Your phone sends a video signal through USB-C or HDMI.
- The capture card records the video on another device (like a laptop).
- Your phone does not do any video encoding.
Because your phone is not recording internally, there is no extra CPU or GPU load. That means:
- No FPS drop
- No thermal throttling from recording
- No storage bottlenecks
However, this setup:
- Costs money
- Requires extra cables and hardware
- Is less portable
It’s usually used by serious content creators, streamers, or competitive players who want professional-level footage.
Best for:YouTubers and streamers who need maximum quality and zero in-game performance loss.
Tips For Long Gameplay Sessions (30+ Minutes)
Budget for these if you're creating content that requires extended recording speed runs, full match recordings, and long-form commentary.
Battery Management During Recording
Recording while charging creates a double heat problem: your phone generates heat from gaming and from the charging process simultaneously. If battery life allows, record on battery rather than plugged in. If you must charge during recording, use a lower-wattage charger (standard 5W or 10W) rather than fast charging; it generates significantly less heat.
At the same time, serious gamers benefit from building strong health and wellness skills, including managing screen time, posture, and rest intervals. Better physical habits support longer, more consistent recording sessions without burnout.
Using A Fan Cooler Accessory: Worth It?
For serious content creators on mid-range devices, semiconductor clip-on coolers (brands like Black Shark, GameSir, or Razer) that attach to the back of your phone are worth considering. They actively pull heat away from the processor and can extend lag-free recording sessions from 20-30 minutes to 60+ minutes. They're not necessary for occasional recording, but for consistent content creation, they're a meaningful quality-of-life improvement.
Scheduling Auto-Stop To Avoid Overheating
Several apps (including AZ Screen Recorder) let you set a recording time limit that automatically stops capture after a defined duration. Use this as a failsafe; set it to 25-30 minutes for budget/mid-range devices. A clean stop is better than a thermal throttle mid-session that ruins the second half of your footage.
People Also Ask
Why Does My Game Lag When I Screen Record On Android?
There are two major causes for lag: Low specifications Android device with overloaded memory (RAM) and CPU. Low specifications Android device (1GB RAM or less) with incompatible settings.
Should I Record To Internal Storage Or An SD Card?
Record to internal storage unless you're certain your SD card is rated UHS Speed Class 3 (U3) or Video Speed Class 30 (V30) or higher. Slower SD cards can't write video data fast enough at mid-to-high bitrates, causing write-lag that shows up as stutter in your footage. Move files to the SD card after recording.
Does Screen Recording Reduce FPS On Android?
Yes. Recording uses processing power that would otherwise support game rendering, which can lower your game’s FPS if settings aren’t optimized.
What Screen Recorder Should I Use For Android Gaming?
Use the built-in Android recorder for stability. If you want more control over quality settings, apps like AZ Screen Recorder let you adjust bitrate and frame rate.
How Much Storage Does Gameplay Recording Use?
Recording at 1080p60 can use roughly 100-150 MB per minute, depending on bitrate settings. Lowering bitrate reduces file size and improves performance.
Final Thoughts
Lag-free recording on Android isn’t about owning the most powerful phone. It’s about understanding how recording and gaming compete for the same resources and adjusting a few key settings before you hit record.
If you remember just one thing: enable hardware encoding first. It delivers the biggest performance improvement across most devices, yet many users never check that setting.
Follow these 11 steps in order and record a short 2-minute test clip before any long session. That quick test tells you if your setup is stable and helps you avoid wasting a full match on laggy footage.
If this helped you, share it with someone struggling with choppy recordings and see which setting makes the biggest difference on your device.